Introduction to custom templates #
There is no limit on the number of customizable templates. You only need to set the template once and save it to the template folder, and then you can access it at any time. The template can use all functions of Dimen Pro, including quick input and automatic verification of correct dimensions.
Template Setup Requirements #
Before setting up a template, you need to make sure that your Excel template meets the following conditions:
- Sequential numbering in your sheet
- If you protect the sheet, allow the user to: format cells.
(Dimen Pro set the cell font to y14.5-2009 when input dimensions and GD&T)
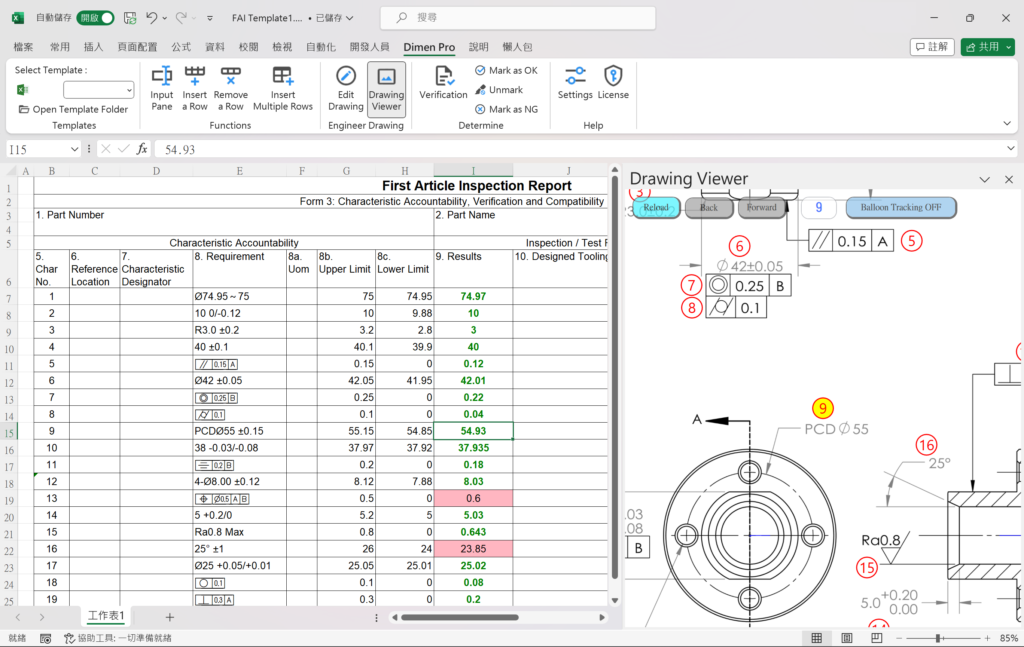
Please refer to the First Article Inspection (FAI) Form 3 in the picture below. This type of straight form can use Dimen Pro. If your form is oriented from left to right, it cannot be used. The following settings will be made based on this picture.

Set the serial number cell #
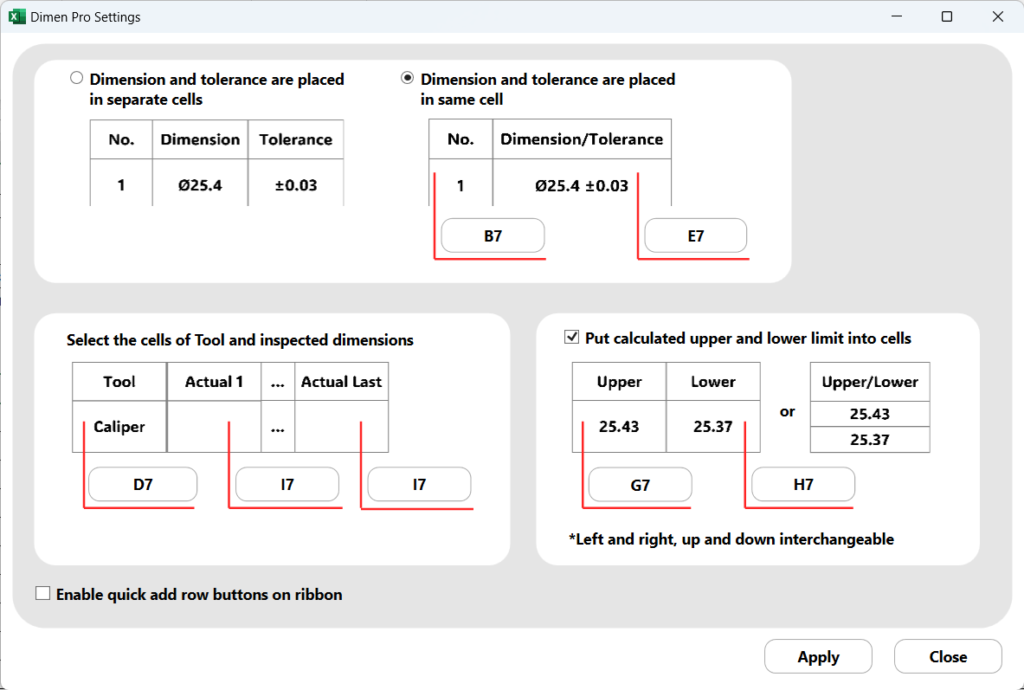
Please set the serial number cell to B7, with the content being the first digit of the serial number.
Set Dimension cell #
Set the cell to E7, select the option to place the dimension and tolerance in the same column, check the option to place the cell for calculating the upper and lower limits, and select G7 and H7 for the upper and lower limit cell respectively.
Set the actual measurement size cell #
In this setting, since there is only one Result cell, please set Actual 1 and Actual Last to I7.

Next steps #
After clicking Apply, the profile information will be stored in this Excel workbook. Please save this template Excel file to the following path. Just use .xls or .xlsx as the file extension.
C:\Users\yourusername\AppData\Roaming\Dimen Pro
*yourusername will vary based on your username
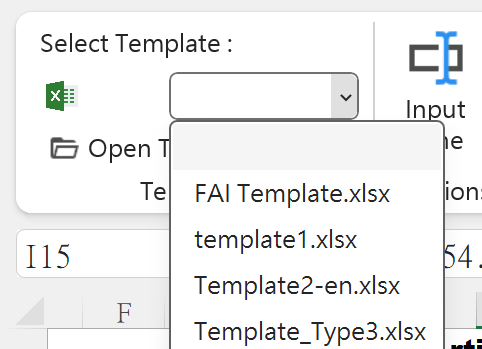
Next, please close all Excel windows and re-run the Excel application. The template menu will be refreshed and this menu will display all the .xls and .xlsx files you have placed in the template folder.
You can also quick open this folder in the Dimen Pro navigation bar.

Using template #
Simply click the left mouse button on the template menu, and your configured template will open, ready for you to start working!
