Prepare #
- Please downlad and install the Dimen Pro, and start your trial.
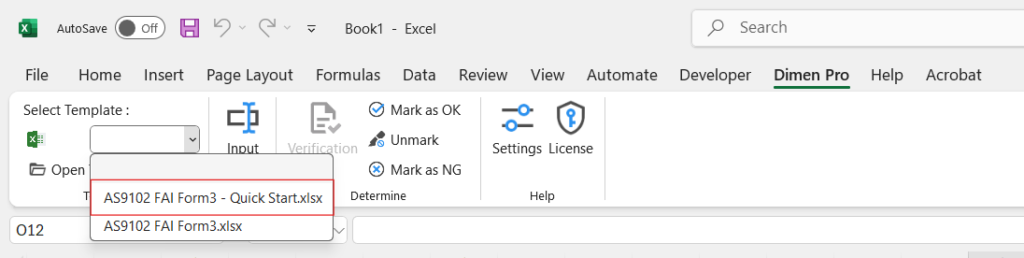
- After Installation, open the Excel application, select template 【AS9102 FAI Form3 – Quick Start.xlsx】
Note:
“AS9102 FAI Form 3 – Quick Start.xlsx” has already been set up.
“AS9102 FAI Form 3.xlsx” has not been set up; you can follow this video to configure it.
Ballooning #

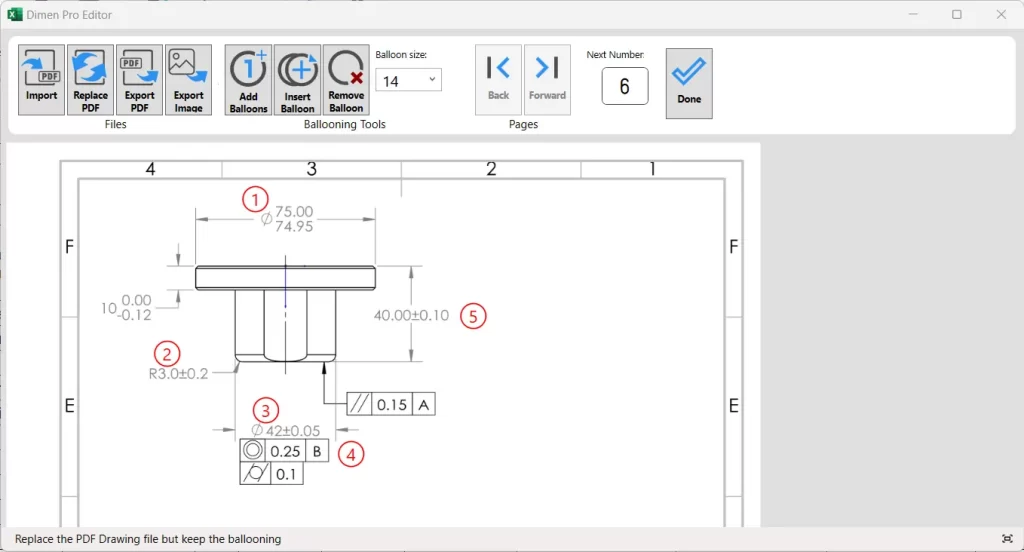
Click the Edit Drawing button on the Excel ribbon to open the Dimen Pro Editor. You will then see a drawing with some existing balloons.
Try using the ‘Add Balloons’, ‘Insert Balloon’, and ‘Remove Balloon’ buttons to see how they work.
Export PDF #
You can export this drawing as a ballooning PDF, but in this template, you will be prompted to provide the source PDF before exporting. This is because the software directly inserts the ballooning information into the PDF. Since this is not a PDF that you imported yourself, you must first select the source file and then choose the save location.
Drawing Viewer #

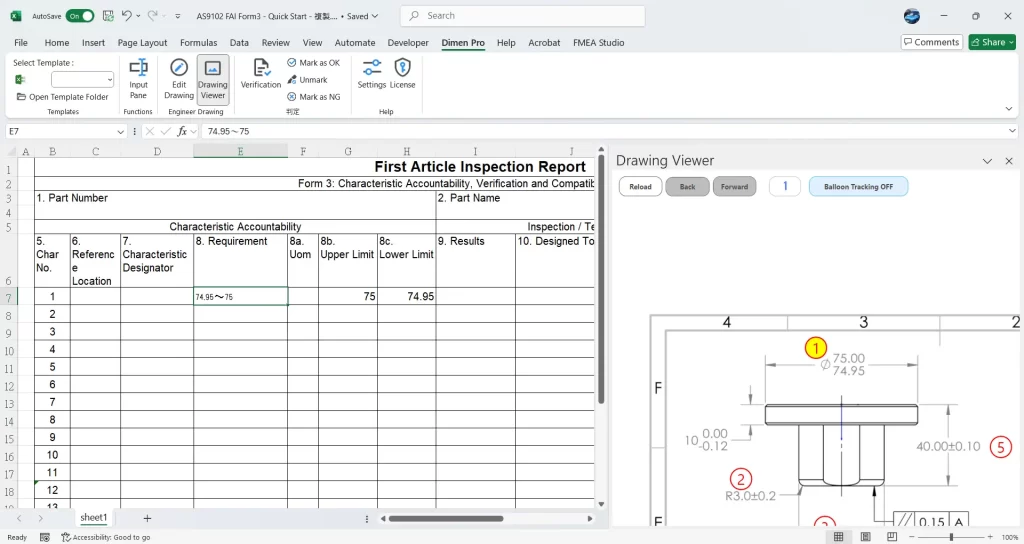
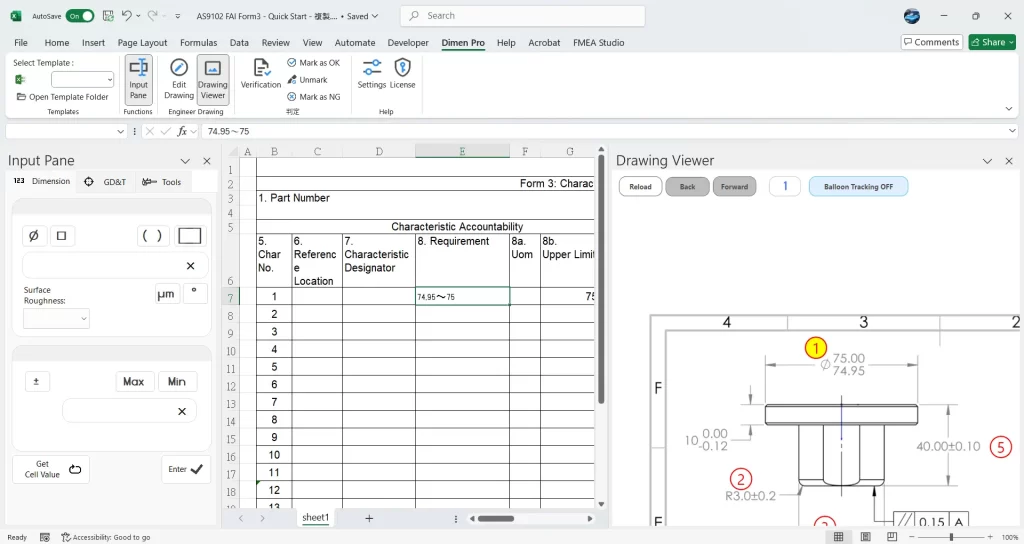
Click the Drawing Viewer button on the Excel ribbon to open the Drawing Viewer. You will then see a drawing showns in Excel.
Balloon Tracking #
When you open the Drawing Viewer, the recently edited drawing will automatically be displayed, and the balloon tracking feature will be activated. Whenever you click on an Excel cell, the view will automatically move to the corresponding balloon number and highlight it in yellow, based on the number in the ‘No.’ column of the selected row.
You can also use the mouse wheel to zoom in and out on the drawing, or click and hold the mouse wheel while moving the mouse to pan the drawing.
Input Pane #

Click the Input Pane button on the Excel ribbon to open the Input Pane.
Dimension and Tolerances #
You can see that there is already a value in cell E7. Click on that cell, then click Get Cell Value to place the value back into the input pane.
Note: If Excel is in edit mode (i.e., you have double-clicked a cell), the Input Pane will be unavailable for use.
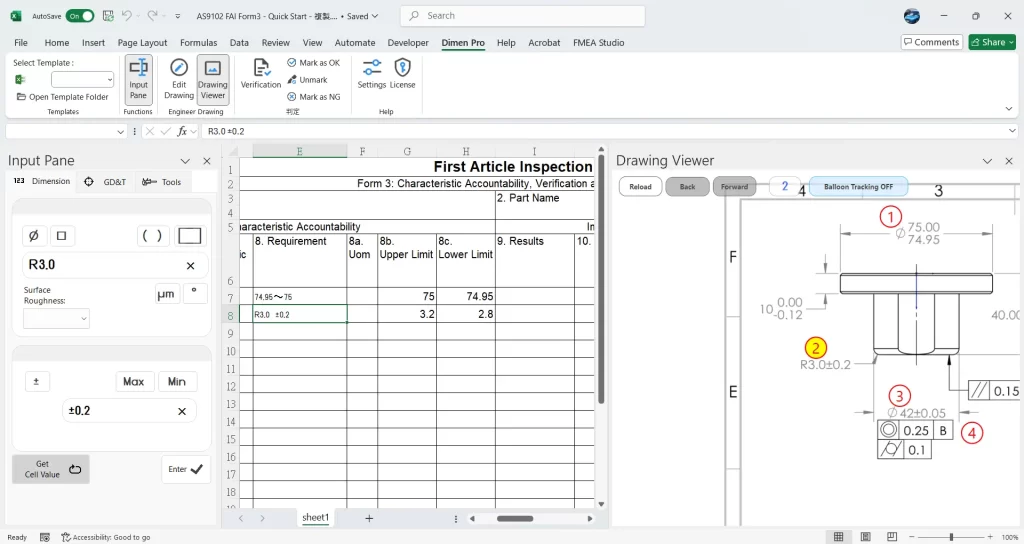
Select cell E8 (at this point, the Drawing Viewer will move to balloon No.2 ). In the text input field at the top of the Input Pane, enter ‘R3.0‘ and press Enter or Tab. The caret will then move to the tolerance input field below. Simply type ‘+-‘ using the keyboard, and it will automatically convert to the ‘±‘ symbol. After entering ‘0.2‘, press Enter, You can see that the dimension and tolerance have been placed in cell E8, while the calculated dimensions are placed in G8 and H8, respectively.
Next, the cell will automatically move to the next one, which is a Ø42 dimension. You can enter ‘@‘, and it will automatically convert to the Ø symbol. As for the tolerance input, if it’s a unilateral tolerance, simply enter as upper/lower in the tolerance field, such as +0.07/+0.03, 0/-0.05, +0.12/0, and so on.
GD&T #
Press the GD&T tab in the Input Pane, you can select and input GD&T symbols into Excel here. These symbols are displayed using the Y14.5-2009 font, so when you input them, the software will automatically change the font of the cell accordingly.

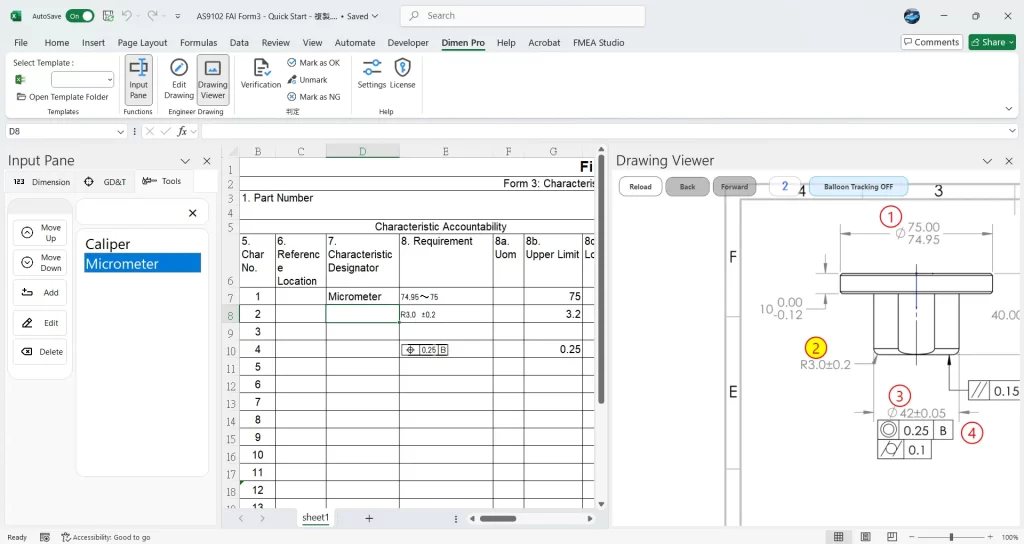
Tools #
Prees the Tool tab, you can save frequently used tools here, and after selecting the cell where you want to place them, double-click the tool with the left mouse button to insert the text into the cell. (The range of cells where the text can be placed is restricted in the settings.)
Verification #
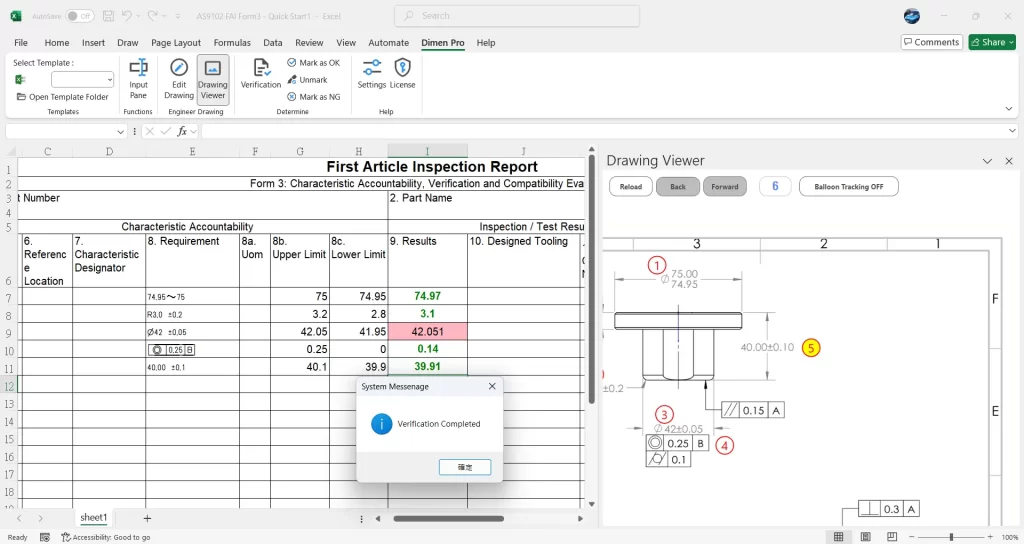
After you complete the measurement and enter the dimensions, click the verification button directly. You will see that the qualified dimensions are in green, and the unqualified dimension cells will be colored in red.